Print on demand is one of the few product businesses you can start without buying stock. You upload a design, a supplier prints it onto a t-shirt or a mug when someone orders, and they ship it. You never touch the product.
AI has changed the middle of that process considerably. It has not changed all of it, and the stage most guides spend their time on is not the stage that decides whether your product looks professional.
This guide walks the whole process end to end, with the specific AI tool doing the work at each step. Everything here can be done manually with ChatGPT, Claude, Gemini, or whatever you already pay for, plus a free image editor. No specialist print-on-demand software required.
What you need before you start
| What | Why | Cost |
|---|---|---|
| A chat AI (ChatGPT, Claude, or Gemini) | Writing design prompts and listing text | Free tier works; paid is faster |
| An image generator | Making the artwork | Included with most paid chat plans |
| A background remover | Cutting the design out | Free (Photopea runs in a browser) |
| An upscaler | Getting the file to print resolution | Free (Upscayl runs locally) |
| A fulfilment account | The company that prints and ships | Free to open (Printful, Printify) |
| A shop | Where people buy it | Etsy charges a listing fee |
The whole pipeline can run on free tools if you’re willing to work slower.
Step 1: Research — the part AI won’t do for you
Research means finding out what is already selling before you make anything. This is the stage where AI helps least, and skipping it is the single most common reason a shop makes no sales.
Search your marketplace for products in the niche you’re considering. Sort by what’s selling rather than what’s new. Then take apart the listings that are doing well and label their parts separately:
- The art style — hand-drawn, vintage distressed, bold vector, watercolour
- The slogan — the actual words, and the joke or sentiment behind them
- The niche — who specifically is buying it, not “people who like dogs” but “people who own reactive rescue dogs”
- The product — which garment, which colours
The skill is seeing the same elements recur across many successful listings. A single good listing tells you nothing; six listings sharing a style tells you what the market currently rewards.
A useful move once you have patterns: a concept proven in one niche is a reasonable bet in an adjacent one. A design that sells well for Halloween is worth testing for autumn generally. You are not guessing, you are extending something with evidence behind it.
Where AI genuinely helps here is organising what you have already gathered. Paste your notes on ten listings into Claude or ChatGPT and ask it to group them by style and identify the recurring elements. It will find patterns in your research. It cannot do the research, because it cannot see what is currently selling on your marketplace.
Asking a model to “design me a t-shirt that will sell” produces something generic, because nothing in the request connects to what people are buying.
Step 2: Turn your research into a design prompt
Here is where the AI work starts, and there’s a step most people skip: use your chat AI to write the image prompt, rather than writing it yourself.
Image models respond to detailed, specific, visually-literate prompts. Chat models are better at writing those than most people are, especially when writing twenty of them.
Give Claude or ChatGPT your research and ask for the prompt. A working structure:
I’m designing a t-shirt for [specific audience]. Based on my research, designs that sell in this niche use [style elements you identified] and slogans that are [tone]. Write an image generation prompt for an original design in that general style. Include a new slogan. Specify a flat light grey background. Give me the prompt only.
Then paste that into your image generator.
Upload a reference image if you have one. Most chat models can look at an image and describe its style in the technical vocabulary an image generator responds to — line weight, colour palette, composition, texture. That description is what you want, not the design itself.
The line you cannot cross
A reference informs your original design. It is never something to reproduce.
Marketplaces remove listings and close shops for copied work, and having generated the copy with AI is not a defence — you are responsible for what you list. Use references to understand why something works stylistically, then make something of your own. The workflow makes copying easy, which is exactly why this needs saying.
Step 3: Generate the design — and get the background right first
Now generate the image. Any current model works: ChatGPT’s image generation, Google’s Gemini image models, or Midjourney if you have it. For designs built around text and slogans, models with strong text rendering matter, because garbled lettering makes a design unusable.
The most important instruction in your prompt has nothing to do with the design. Specify the background:
…on a flat, even, light grey background with no shadows or texture.
Here’s why this one line saves more time than anything else in the process.
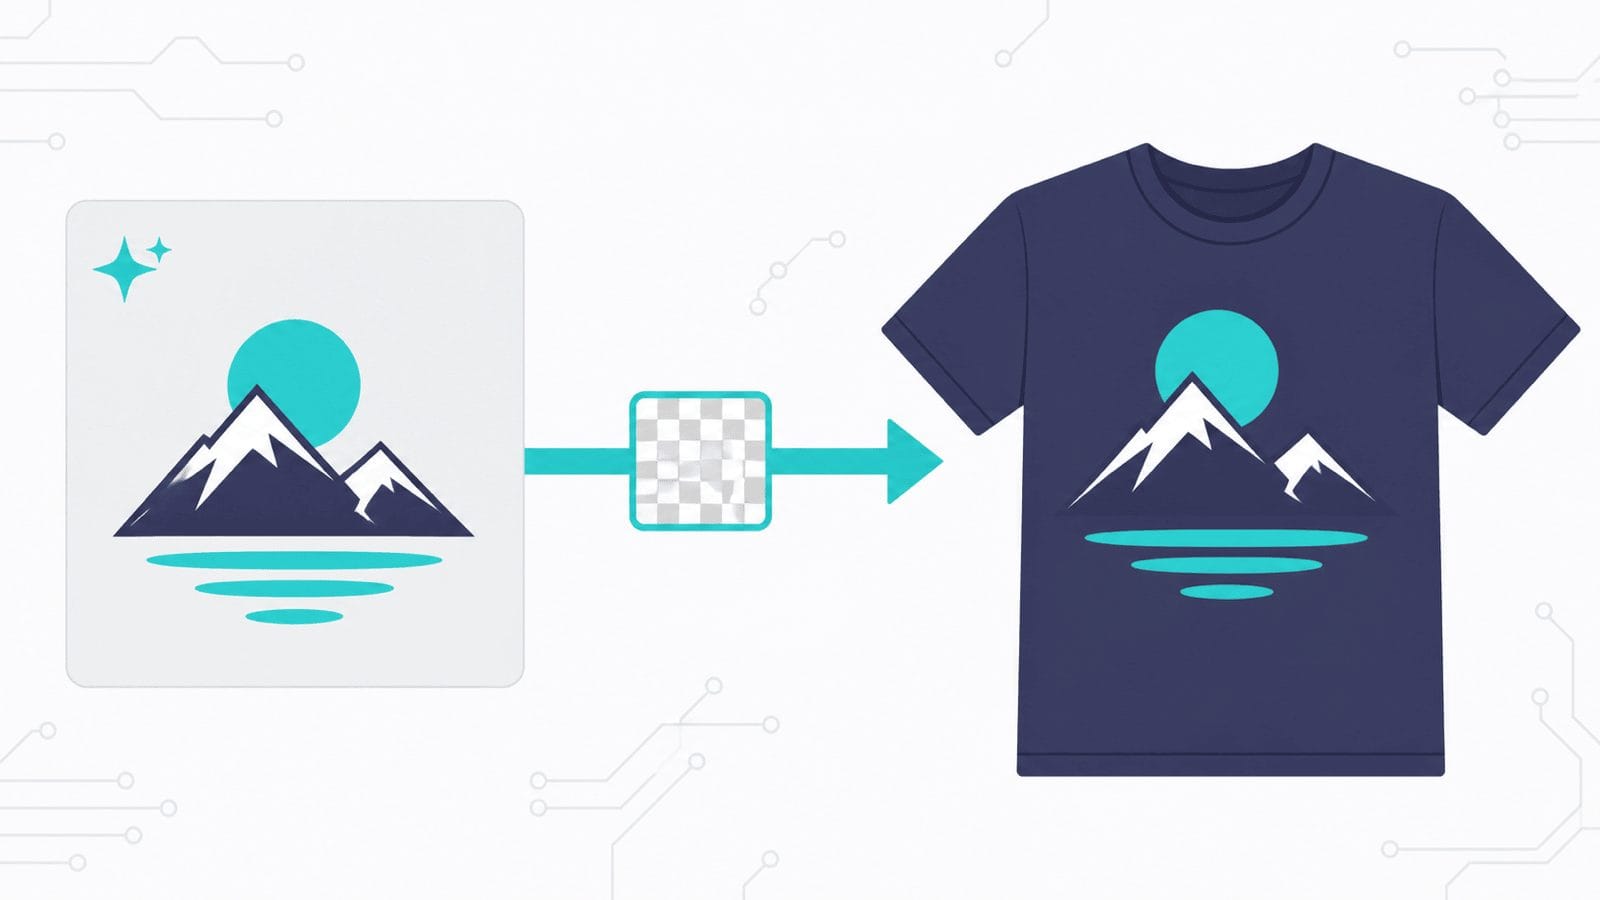
Your design has to end up on a transparent background — no background at all, so the shirt colour shows through. Two things make this harder than it sounds:
- The ChatGPT app cannot produce true transparency. The consumer chat interface has no concept of an alpha channel, so an image that looks like it’s on a transparent background is really on a white one. Asking for a transparent background in a chat app does not give you one. (OpenAI’s API has a transparency setting, but support varies by model and it’s not something you reach through the normal chat window.)
- Automatic background removal fails when the background colour also appears in your design. If your design has a cream-coloured dog on a cream background, the remover takes the dog with the background. You get a hole where the animal was, and then you’re fixing it by hand.
So you choose the background yourself, in the prompt, before the problem exists. Pick a flat colour that appears nowhere in the artwork — light grey usually works, but if your design is grey, pick something else.
If you get a design you love on a difficult background, regenerate it rather than repairing it. One more generation costs pennies. Manual cleanup costs twenty minutes and usually looks worse.
That’s the rule worth taking from this whole guide: generate on a background you chose to remove. It applies any time you need a cut-out AI image, whether or not you ever sell a t-shirt.
Step 4: Prepare the file for printing
Making the design is the easy half. Preparing it is where quality is actually decided, and it’s five actions in a specific order.
| # | Action | What it does |
|---|---|---|
| 1 | Check the print area | Find the dimensions your product actually prints at |
| 2 | Upscale | Raise the file to print resolution |
| 3 | Remove the background | Cut the artwork out onto transparency |
| 4 | Crop | Trim empty space from around the design |
| 5 | Scale and position | Place it on the garment |
1. Check the print area
Your fulfilment company publishes the print dimensions for every product. Printful’s standard DTG t-shirts (direct-to-garment, meaning ink applied straight onto the fabric) use a print area around 12 × 16 inches, with some products going larger.
Find this number before you edit anything. Everything downstream is sized against it.
2. Upscale
AI images come out at screen resolution. Print needs more.
Printful asks for a minimum of 150 DPI on most products, 300 DPI on small items like phone cases and stickers, and specifically advises against going above 300 — larger files don’t print better, they just take longer to process.
DPI is dots per inch: how much detail exists in each printed inch. The catch is that DPI depends on physical size. The same file is 300 DPI on a 5-inch print and 75 DPI on a 20-inch one. A design that looks sharp on screen can be far too soft at 12 inches across.
Upscayl is free, open source, and runs on your own machine on Windows, macOS and Linux with no upload and no account. It needs a compatible GPU, so it won’t run on every machine — most paid image editors include an upscaler as a fallback.
3. Remove the background
With a flat background you chose in Step 3, this is usually one click. Photopea does it free in a browser and processes everything on your own machine, so your designs aren’t uploaded anywhere.
Three settings worth knowing when a cutout isn’t clean:
- Tolerance — how close a colour has to be to the one you picked before it gets removed. Too low leaves a halo, too high eats into your artwork. Adjust it rather than accepting the default.
- Edge feather or choke — pulls the cut edge in slightly, removing the faint fringe of background colour that survives most automatic removals.
- Zoom in on the edges before you accept it. Fringing that’s invisible on screen is clearly visible printed on a dark shirt.
Save as PNG. JPG cannot store transparency, so a JPG will print with a white box around your design.
4. Crop
Trim the transparent space around the artwork so the design fills the frame.
This matters more than it sounds: if you skip it, the print system scales your file including all the empty space, and your design comes out smaller than intended and sitting off-centre.
5. Scale and position
Now place the design in the print area. A reasonable starting point for a front-of-shirt graphic is around 80% of the available width, positioned slightly down from the top of the print area rather than dead centre — a design centred in the print area often sits too low on the body.
Order a sample before you sell hundreds of anything. Screen and fabric are different, and a colour that looks right on a monitor can disappear into a heather grey shirt.
One more file check
Save in sRGB colour, specifically sRGB IEC61966-2.1 — the profile Printful asks for. Print systems convert to their own colour space, and starting in the wrong one shifts your colours unpredictably.
Step 5: Put the design on the product
Upload your finished PNG to your fulfilment account, choose the garment and colours, and position the design using their template. Printful and Printify both generate product photographs — mockups — automatically once your design is placed.
Two things worth doing here:
- Choose garment colours that suit the design, not all of them. A design with dark linework disappears on a black shirt. Fewer, better-matched colours outperform every colour available.
- Check the mockups actually look right. Automatically generated mockups sometimes place a design too high, too large, or at an odd angle. Regenerate rather than listing something that looks off.
If you’re doing this repeatedly, save the product configuration as a template — garment, colours, pricing, description boilerplate — so each new listing only needs the design swapped in.
Step 6: Write the listing with AI
This is the step AI does best, and it works far better if the model can see the design.
Upload your finished design image to Claude or ChatGPT and ask for the listing copy. Models read the image and produce keywords grounded in what’s actually there rather than in your description of it.
Etsy’s limits, which your prompt should state explicitly:
- Title: up to 140 characters
- Tags: 13 tags, maximum 20 characters each
- Description: no meaningful limit
A prompt that works:
Here’s a t-shirt design I’m listing on Etsy. Write: – A title under 140 characters, with the most important keywords first – Exactly 13 tags, each under 20 characters, no repeats of the same phrase – A description opening with what the product is and who it’s for The audience is [specific audience]. Use the words buyers would actually search, not marketing language.
Use all 13 tags. Read what it produces before accepting it — models reliably generate one or two tags that are too generic to compete on, and swapping those for more specific phrases is a two-minute edit.
Step 7: Publish — and disclose properly
Two disclosure requirements apply, and both are policy rather than etiquette.
Disclose your production partner. Etsy requires sellers to declare any third party involved in physically producing their items. Your print-on-demand company is a production partner and has to be listed as one. You add production partners in your shop settings, then link them to each listing.
Disclose the AI. Etsy’s Creativity Standards cover AI-generated work explicitly. Seller-prompted AI art is permitted on the marketplace, and it belongs in the “Designed by a seller” category rather than being presented as made by hand — with the use of AI disclosed.
Neither of these is optional, and neither is a reason not to do this. Etsy allows AI designs. It requires you to be straight about how they were made and who printed them.
Policies change, and this one has changed more than once. Read Etsy’s own Creativity Standards and Seller Policy before your first listing rather than trusting any guide, including this one.
Scaling it up without special software
Once one product works, the bottleneck becomes writing prompts. There’s a straightforward manual version of what expensive tooling automates.
Ask for the whole batch in one message. Rather than prompting for one design at a time:
Using the same style brief above, write 10 image generation prompts for this niche. Vary the slogan and composition in each. Keep the style consistent and specify a flat light grey background in every one. Number them.
Then generate them one after another.
Keep your style brief in a reusable place. Save it as a Claude Project, a Custom GPT, or just a text file you paste in. It holds the parts that don’t change — audience, art style, background instruction, tone — so each new batch only needs the new theme.
Change one variable at a time. With a saved brief, generating a seasonal run means swapping “autumn” for “winter holidays” and rerunning. Same proven style, new theme, one edit.
This is the same idea the automated tools sell: write the instructions once, change only the theme, generate many. Doing it in a chat window is slower per batch and costs nothing extra.
Where AI helps and where it doesn’t
| Stage | What AI does | What stays yours |
|---|---|---|
| Research | Organises notes you’ve already gathered | Finding what sells; choosing the niche |
| Design prompts | Writes better prompts than most people do | The brief it works from |
| Generating art | Nearly all of it | Judging whether the output is good and original |
| File prep | Background removal, upscaling | Checking edges; deciding to regenerate |
| Mockups | Generated automatically | Colour choices; rejecting bad ones |
| Listing copy | Titles, tags, descriptions from the image | Final read; swapping weak tags |
| Pricing | Nothing | All of it |
| Publishing and disclosure | Nothing | All of it |
The pattern: AI is strong in the middle of this process and absent at both ends. It cannot tell you what to make, and it cannot decide what to charge or what to publish.
What this costs
- Image generation — included in most paid chat subscriptions at moderate volume. Generating hundreds of designs a month means paying per image.
- Prep tools — free, if you use Photopea and Upscayl.
- Listing fees — Etsy charges per listing plus a percentage of each sale.
- The product itself — your fulfilment company’s base cost comes off every sale before you make anything.
- Samples — worth budgeting for. Ordering your own product once is the only way to know what it looks like.
The genuine saving is on design labour. Whether it clears the other costs depends entirely on whether the designs sell, which takes you back to Step 1.
Honest limitations
Everyone has these tools. Faster production doesn’t create an advantage when every competitor’s production also got faster. What still separates shops is research and taste — the two things in this process that are not automated. Treat AI as removing the bottleneck on execution, not as a reason to expect sales.
Background removal still needs your eyes. Designs with soft edges, fur, hair, or fine texture come out imperfect. Zoom in every time.
Text in AI images is unreliable. Models have improved considerably at rendering words, and they still produce a misspelling or a malformed letter often enough that every slogan needs reading character by character before it goes on a shirt.
Speed claims are mostly marketing. People demonstrating “a listing in ten minutes” are experienced sellers using purpose-built software they usually sell. Your first product will take an afternoon. That’s normal, and the second one is much faster.
Marketplace policy is your responsibility. Disclosure requirements change. Check them yourself before listing.
Key takeaways
- Research first. It’s the stage AI can’t do, and skipping it makes the rest pointless.
- Have your chat AI write the image prompts — it writes better ones than most people, especially in bulk.
- Specify a flat, removable background in the prompt. Chat apps can’t produce real transparency, and cutting out a design that shares a colour with its background is where the time goes.
- Regenerate rather than repair. A new image costs pennies; manual cleanup costs twenty minutes.
- Check the print area, then upscale to at least 150 DPI at final print size. Save as PNG in sRGB.
- Let the model see the design before it writes your listing copy.
- Disclose your production partner and your AI use. Both are required, neither is a barrier.
Related reading
Getting more from image generation
- Nano Banana Explained: The Complete Gemini Image Guide
- How to Create Stunning Images with ChatGPT’s New Generation Feature
- AI Design Is Actually Simple—Here’s What Really Works
Other things to sell